1. Light Microscope
1.1. Compound light microscope has 2 lens - the objective lens which is near the specimen and the eyepiece lens where the specimen is seen through.
1.2. The objective lens magnifies the image which is then magnified again by the eyepiece lens.
1.2.1. This allows for a much higher magnification than a normal light microscope meaning organelles can be further analysed in more detail.
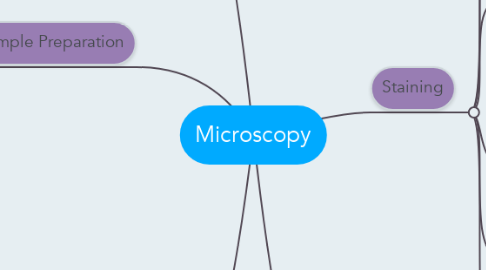
2. Sample Preparation
2.1. Dry Mount
2.1.1. Solid specimens are viewed or cut into very thin slices with a sharp blade, this is called sectioning. then the specimen is placed onto the center of a slide and a slip is spaced over it.
2.2. Wet Mount
2.2.1. Specimens are suspended in a liquid such as water or an immersion oil. A cover slip is placed on from an angle.
2.3. Squash Slides
2.3.1. A wet mount is first prepared, then a lens tissue is then used to gently press down the cover slip. Potential damage to the slip can be avoided by squashing the sample between two microscopic slides. this is a good technique for soft samples.
2.4. Smear Slides
2.4.1. The edge of a slide is used to smear the sample, creating a thin, even coating on another slide. A cover slip is then placed over the sample. This is a good technique for blood samples.
2.5. Fixing
2.5.1. Chemicals like formaldehyde are used to preserve specimens in as near-natural state as possible
2.6. Sectioning
2.6.1. Specimens are dehydrated with alcohols and then placed in a mould with wax or resin to form a hard block. This can the be sliced very thinly by a knife called a microtome.
3. Staining
3.1. Cell structures are usually transparent so stains are used to increase contrast between different organelles and between the specimen and the background.
3.1.1. This means that components are more visible and easier to identify.
3.2. Preparing a Sample for Staining
3.2.1. First it is placed the the slide and allowed to air dry. once dry it is heat-fixed by passing the slide through a flame. The specimen will adhere to the slide and take up the stain.
3.3. Dyes
3.3.1. Crystal violet and methylene blue are positively charged dyes, which are attracted to negatively charged materials. These materials allow the dye in and the cell is stained.
3.3.2. Nigrosin or congo red are negatively charged so are repelled by negatively charged material. This means the dye stays outside the cell and stains the background. This is a negative staining technique.
3.4. Differential staining can distinguish between between two types of organisms that would otherwise be hard to identify. it can also help differentiate between different organelles of a single celled organism.
3.5. Gram Stain Technique
3.5.1. Used to separate bacteria into two groups, Gram-positive and Gram-negative. Crystal Violet is first applied, the iodine to fix the dye. The slide is the washed with alcohol. the Gram-positive retain the dye and will appear blue. Gram-negative bacteria can't retain the dye because they have thinner cell walls. A counterstain (safranin dye) is then used to dye the Gram-negative bacteria red.
3.6. Acid Fast Technique
3.6.1. Used to differentiate species of Mycobacterium from other bacteria. A lipid solvent is used to carry the dye into the cells. Then the cells are washed with a dilute acid-alcohol solution which causes all other bacteria to lose the stain and then be dyed by methylene blue. Mycobacterium appear bright red.
4. Risk Assesment
4.1. Many of the stains used are toxic or can cause irritation so a risk assessment must be carried out before every practical to identify anything that could cause or result in harm.
5. Drawing In Microscopy
5.1. Scientific drawings are fine line drawings not pictures. They are used to highlight particular features and should not include unnecessary detail.
5.1.1. Include a title
5.1.2. State Magnification
5.1.3. Use a sharp pencil for drawings and labels
5.1.4. Use white, unlined paper
5.1.5. Fill as much of the space as possible
5.1.6. Use smooth, continuous lines
5.1.7. Do not shade
5.1.8. Ensure proportions are correct
5.1.9. Label lines shouldn't have arrowheads and shouldn't cross

