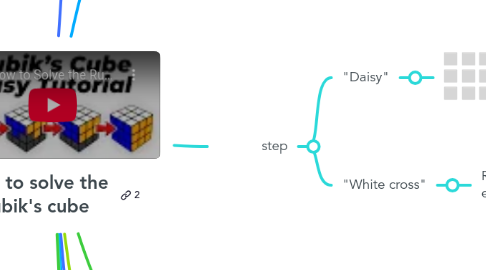
1. Get to know the Cube
1.1. Pieces
1.1.1. Centre pieces (opposites)
1.1.1.1. Yellow
1.1.1.2. White
1.1.1.3. Green
1.1.1.4. Blue
1.1.1.5. Red
1.1.1.6. Orange
1.1.2. Edge pieces (two stickers)
1.1.3. Corner pieces (three stickers)
1.2. Sides
1.2.1. (R)ight
1.2.2. (L)eft
1.2.3. (U)p
1.2.4. (D)own
1.2.5. (F)ront
1.2.6. (B)ack
1.3. Layers
1.3.1. First (bottom)
1.3.2. Second (middle)
1.3.3. Last (top)
2. Understand moves and their notation
2.1. Main principle: all movement is done from POV looking directly on the centre piece ofparticular side
2.2. Moves notation
2.2.1. U2 means double turn
2.2.2. U means one clockwise turn of up side
2.2.3. U' means counter clockwise turn
2.2.4. f means turning to Front layers together
2.3. Key moves sequences
2.3.1. R U R' U' – "The Righty Alg"
2.3.2. L' U' L U – "The Lefty Alg"
2.3.3. Spin right – follows the U turn
2.3.4. Spin left – follows the U' turn
3. step
3.1. "Daisy"
3.1.1. :white_large_square: :white_large_square: :white_large_square: :white_large_square: :white_large_square: :white_large_square: :white_large_square: :white_large_square: :white_large_square:
3.2. "White cross"
3.2.1. Rotate two bottom layers, until edge match center piece color
3.2.1.1. F2
3.2.1.1.1. Repeat until havin whit cross on the first (bottom) layer
4. step "First layer corners"
4.1. The goal is to solve each corner, to math all three colors of its centre pieces
4.2. Spot corners with white stickers on the last (top) layer
4.2.1. Check particular corner it has right colors on its sides (matching two adjacent centers on the F and R sides)
4.2.1.1. If not, turn two bottom layers to matching state
4.2.1.1.1. Perfrom the Righty Alg until the corner piece is on the first (bottom) layer (in its intended place)
4.2.1.1.2. If white sticker of the corner piece faces not up, but sideways, then do the same Alg, just couple more times until reaching the same result
5. step "Second layer edges"
5.1. Spot 4 edges of the second layer, the goal is to position them in to their correct posiotions. We won't be moving them directly, instead...
5.1.1. ... We will be moving edge pieces of the last (top) layer without yellow stickers and moving them to appear on the right edge of the second layer (right means, squares facing their matching centre colour)
5.1.1.1. Rotate two bottom layers, until edge match centre piece color
5.1.1.1.1. Check the top sticker color and identify corresponding center.
5.1.1.1.2. If you don't have edge pieces wihtout yellow stikers, just swap any of it with any edge piece from secon layer by performing same logic
6. step "Yellow cross" on the top
6.1. If you have a yellow Line, hold it horizontally
6.1.1. F, Righty Alg, F'
6.2. If you have Angle, hold it to have ende on the right and edge on the bottom:
6.2.1. f, Righty Alg, f'
6.3. If you have a Dot, perform the sequence for the Line:
6.3.1. F, Righty Alg, F'
6.3.1.1. Get the Angle
7. step "Position the Last corners"
7.1. If all Last corners are in the right spots (between sides with corresponding colors) – proceed to the next step
7.2. If two of the corners on the same side doesn't positioned correctly, hold them to the right side, (yellow center facing up):
7.2.1. Rigthy Alg × 3, Spin Right , Lefty Alg × 3
7.2.1.1. Rotate d to check
7.3. If you need to swap corners diagonally:
7.3.1. Do adjacent swap
7.3.1.1. Check that two wrong corners on the same side, and repeat adjacent swap.
8. step "Twisting the Last corners"
8.1. Twisting all yellow stickers to be facing up
8.1.1. Turn cube upside down
8.1.1.1. Position corner in question to the closest to you bottom corner of the right side
8.1.1.1.1. Repeat Righty Alg until the corner is correctly twisted
9. step "Solving the last layer edges"
9.1. 3 edges to solve
9.1.1. Spin cube to solved side
9.1.1.1. Rigthy Alg × 1, Lefty Alg × 1, Rigthy Alg × 5, Lefty Alg × 5
9.1.1.1.1. If it doesn't solve repeat once again
9.2. 4 edges to solve
9.2.1. Rigthy Alg × 1, Lefty Alg × 1, Rigthy Alg × 5, Lefty Alg × 5
9.2.1.1. Spin to face solved side
