
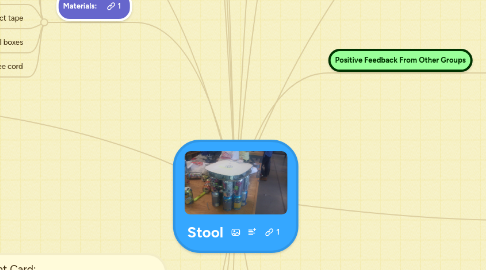
1. Our first prototype complete
2. Comment Card: Please rate the following: (1 - Poor ... 5 - Excellent) Aesthetics 1 2 3 4 5 Functionality 1 2 3 4 5 Comfort 1 2 3 4 5 Overall Product 1 2 3 4 5 Other Comments (Any are appreciated) :
3. Materials:
3.1. 18 Pop cans
3.2. Superglue
3.3. Pizza box
3.4. Duct tape
3.5. 2 Cereal boxes
3.6. Bungee cord
4. Materials Required for the future build
4.1. Hinge
4.2. 3 Bungee Cords
4.3. Cloth for the cushion
4.4. Plastic bags/milk bags to stuff the cushion
4.5. Pop cans to add height
4.6. Velcro
4.7. 60 soup cans
4.8. Halloween spider webs
5. Design
5.1. Thread cord through the holes cut into the cans to form a circular shape
5.2. The stool can fold into a compact, flat shape once the hinges are undone
5.3. The top "sitting" compartment can be swung back due to a hinge and will rest onto the flattened cans, forming a fold-able stool.
6. Timeline
6.1. Week 2: Brainstormed up-cycling ideas (pen, vase, chair)
6.2. Week 3: Examined sketches of different up-cycling ideas and figured out their constraints and criteria
6.3. Week 4: Created Gantt chart, bill of materials and detailed sketch of stool
6.4. Week 5: No seminars, met up to create second draft of sketch and a new bill of materials
6.5. Week 6: Built stool prototype number 1
6.6. Week 7: Brought prototype to seminar, provided feedback to other groups' prototypes and received feedback on ours
6.7. Week 8: Review the positive and negative feedback from the peer review and work on improving the future design of our stool.
6.8. Week 9 & 10: Construct the final design and prepare for the presentation
7. Updated Bill of Materials FINAL
7.1. 40 Soup Cans - $0
7.2. PI Glue - $10.95
7.3. 2 Bungee Cords - $3.50
7.4. 12 Small Pieces of Velcro - $4.39
7.5. Strip of velcro - $5.99
7.6. Pizza Box - $0
7.7. Hot Glue - Tool
7.8. Red and Green Spraypaint - $10
7.9. 6 Cereal Boxes - $0
7.10. Duct Tape - $5.49
7.11. Towel - $0
7.12. Stuffing (left over cobwebs from halloween) - $0
7.13. Stapler - Tool
7.14. Drill - Tool
7.15. X-Acto Knife - Tool
7.16. Total Cost: $24.33
8. How To Use It
8.1. Unfold cans and place in a circular form
8.2. Velcro the ends of the bungee cord to the appropriate ends
8.3. Place seat on the top, ensuring that the seat lines up with the front
8.4. Sit on it !!
8.5. Relax. You're sitting on a cloud.
8.6. Once finish... unattach the cushion from the top of the chair and unvelcro the two velcro latches on the sides in order to pack the chair up nice and comfortably.****
9. Build Instructions FINAL
9.1. Clean and dry 40 soup cans (284mL)
9.2. Use the PI glue to create 10 columns of cans. Each column is 4 cans in height. Then wait at least an hour for the cans to dry
9.3. Using an X-acto knife carefully cut away excess glue
9.4. When dry, on the top and bottom can, drill two holes on opposite ends of the can approximately 1.5 cm in diameter. Make sure the wholes lie in the center of the top and the center of the bottom can on both side, approximately 6 and 1/2 cm from the top of the can.
9.5. Spray paint five of these columns an ugly blue and the rest beige
9.6. Place duct tape around the sections that connect the cans together for further reinforcement
9.7. Remove the hooks at the ends of both bungee cords. Tip: buy the bungee cords with removable plastic hooks instead of the metal hooks, they are easier to remove and cost less.
9.8. Thread one bungee cord through all the top cans, and one bungee cord through all the bottom cans.
9.9. Cut the cardboard of the cereal boxes into 1" by 12" strips, to roll into little cylinders. Create approximately 100 of these small tubes
9.10. Cut out two circles from the pizza box, 12" in diameter for the seat
9.11. Use glue to stick the tubes vertically on to the seat. Then attach the other circle on the top to finish the seat
9.12. Using the Halloween spider webs, pull and stretch to create an appropriate volume and cushion for the seat
9.13. Use the hot glue gun and duct tape to attach the spider webs to the top of the seat
9.14. Place the towel on top of the seat and use glue and staples to ensure the towel remain in place. Cut and shape the towel as needed to cover the whole seat and remove excess folds.
9.15. Add velcro pieces on top of all ten cans and place the appropriate opposites on the under side of the seat.
9.16. Tie tight knots onto the bungee cords for maximum stability and to prevent slipping of the cans
9.17. For the remaining two strips of velcro attach two on the one column of the stool and the opposites on the bungee cord ends so the stool can be fastened and de-fastened easily.
9.18. CONGRATULATIONS. The stool is complete. For further instruction on how to use it, refer to the section titled "How to use it"
10. pics
11. Prototype 1
11.1. Not made to scale (only 2 cans tall) and is made with inexpensive materials.
12. Negative Feedback from other groups
12.1. Cans cannot support the required weight, broken aluminum cans are hazardous
12.2. Too difficult to build
12.3. The hooks are difficult to use, velcro would be of better use
12.4. Holes in cans are sharp
12.5. Not enough cardboard cylinders, not enough to support sufficient weight
12.6. Stool is too small
12.7. Cans are easily crushed when on its side
12.8. Too much tape, not aesthetically pleasing
13. Future Plans and Modifications
13.1. Eliminate sharpness of carved holes to further enhance the safety
13.2. Add weight to the bottom cans to create a more sturdy stool
13.3. Create a fold-able seat to make the stool collapsible
13.4. Make the stool form a more circular shape when open to ensure better stability and strength
13.5. Make stool taller use four cans for height instead of two
13.6. Add bungee cords to each row of cans instead of just the bottom ones
14. Modifications Based on Peer Review
14.1. Needs to be sturdier
14.1.1. Replace aluminum cans with soup cans
14.1.2. Use stronger glue between the cans
14.1.3. Add rubber bottoms to the soup cans to prevent slipping
14.1.4. Add a small weight to the bottom of the can to improve stability
14.2. Create a bigger model
14.2.1. Add two more rows of cans to create a height of four cans
14.2.2. Add two more columns of cans for a larger circumference
14.3. Edges are too sharp and are a safety hazard
14.3.1. Grind down the sharp edges from the holes cut in the soup cans
14.4. The chair is uncomfortable
14.5. The thing is ugly
14.5.1. Spray paint the cans to make it purtyfull
14.5.2. The cushion will add a higher quality of aesthetics
14.5.3. Make sure duct tape is hidden
14.6. Make the seat stronger
14.6.1. Add more tubes of cardboard to reinforce the seat
14.6.2. Put the cardboard tubes closer to the edges of the seat
14.7. Clean the cans
14.7.1. Make sure the cans have no liquid in them
14.7.2. Ensure they are dried after cleaning
14.8. Increase flexibility between the cans
14.8.1. Increase the number of bungee cords used
15. How we made prototype 1
15.1. Drill holes into 8 popcans using the electric drill
15.1.1. Two holes per can
15.1.2. Each hole approximately 2 cm in diameter
15.1.3. Holes are on opposite sides of each can and approximately in the middle of the can
15.1.4. Send bungee cord through the holes to make a more stable base
15.2. Superglue two cans together
15.2.1. Superglue the top rim of a can with no hole and stack the can with two holes on the top
15.2.2. The result is 8 stacks of cans
15.3. Remove one hook from the end of the bungee cord and thread it through the holes made in the cans
15.4. Cut two circles out of the pizza box cardboard
15.4.1. Circle should be approximately 12 inches in diameter
15.5. Cut the thin cardboard into rectangular strips approximately 1 by 12 inches
15.5.1. Make approximately 40 of these strips
15.6. Roll the strips into thin cylinders and reinforce with duct tape
15.6.1. Adding a cushion using clothing and stuffing it with halloween spider webs
15.7. Tape the cylinders onto the pizza box circle vertically and place the other pizza box circle on top, reinforce with duct tape
15.7.1. Result is cylinders sandwiched between two pizza box circles, creating the stool seat