

My First Mind Map
por Lasma Poruka
1. Add links, tasks or files to your topics, using the widgets in the sidebar
2. With our short tutorial videos you can get to know MindMeister's most important features in a matter of minutes
3. Mind Map Training
3.1. Visit the MindMeister Academy to learn all the tricks and become a great mapper in no time!
4. Tutorial Videos
5. Key Shortcuts
6. Mobile Apps
6.1. Download our native mobile apps for iOS and Android to mind map on the go!
7. Stay in the Know
7.1. Follow our blog to never miss an important update, downtime warning or tutorial!
8. Add a sibling idea by hitting ENTER
9. This is a sibling idea
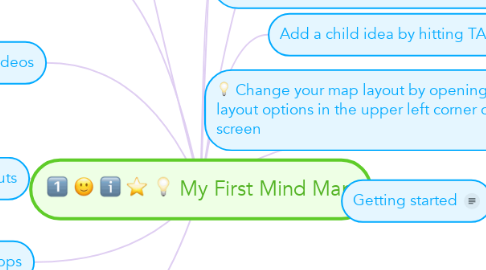
10. Change your map layout by opening the layout options in the upper left corner of your screen
11. Add a child idea by hitting TAB
11.1. This is a child idea
12. Connect topics with the arrow tool in the upper left corner of your screen
13. Choose icons and images to decorate your mind map
14. To view the most important shortcuts, click on the question mark in the bottom right corner of your map editor, then click "Key Shortcuts"
15. By the way, this is a floating topic. To create a floating topic, simply drag it away from the map center.
16. Getting started
16.1. Advanced
16.1.1. Open the Theme menu from the bottom of your map editor to change your map theme
16.1.2. Create a presentation of your mind map by clicking the presentation icon in the bottom left corner of your screen
16.1.2.1. Simply hold down COMMAND i.e. CTRL and Click & Drag to create a slide for one or multiple topics
16.1.2.2. Set transitions for your slides
16.1.2.3. Click "Start Slideshow" to view your presentation
16.1.3. Open the Sharing Settings from the bottom of your map editor to share the map with a friend or publish it to the web
16.1.3.1. You can share your map with anyone via email
16.1.3.2. You can publish your map and enable anyone with an internet access to find it
16.1.3.3. You can embed your map on a blog or website