
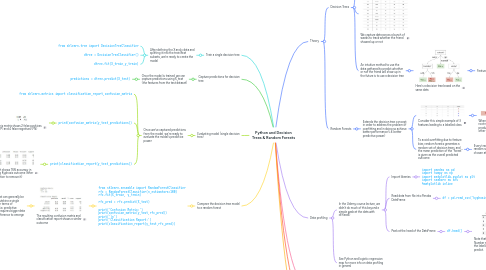
1. Train a single decision tree
1.1. After defining the X and y data and splitting it into the train/test subsets, we're ready to create the model
1.1.1. from sklearn.tree import DecisionTreeClassifier
1.1.2. dtree = DecisionTreeClassifier()
1.1.3. dtree.fit(X_train,y_train)
2. Capture predictions for decision tree
2.1. Once the model is trained, we can capture predictions using X_test (the features from the test dataset)
2.1.1. predictions = dtree.predict(X_test)
3. Evaluating model (single decision tree)
3.1. Once we've captured predictions from the model, we're ready to evaluate the model's predictive power
3.1.1. from sklearn.metrics import classification_report,confusion_matrix
3.1.2. print(confusion_matrix(y_test,predictions))
3.1.2.1. This matrix shows 2 false positives (FP) and 4 false negatives (FN)
3.1.2.1.1. Remember the layout of a confusion matrix
3.1.3. print(classification_report(y_test,predictions))
3.1.3.1. The report shows 76% accuracy in predicting Kyphosis outcome (after the operation to remove it)
4. Compare the decision tree model to a random forest
4.1. from sklearn.ensemble import RandomForestClassifier rfc = RandomForestClassifier(n_estimators=100) rfc.fit(X_train, y_train) rfc_pred = rfc.predict(X_test) print('Confusion Matrix:') print(confusion_matrix(y_test,rfc_pred)) print('\n') print('Classification Report:') print(classification_report(y_test,rfc_pred))
4.1.1. The resulting confusion matrix and classification report shows a similar outcome
4.1.1.1. A random forest can generally be expected to outshine a single decision tree in terms of performance (i.e. predictive power), but it requires bigger data sets for the difference to emerge
4.1.1.1.1. In this case, the source data file used for training and testing the model only contained 81 records
4.1.1.1.2. Another issue with this data is biased outcomes; if we run the following we see that the "absent" outcome vs "present" is a 64 vs 17 split
5. Theory
5.1. Decision Trees
5.1.1. To intuitively understand the concept of a decision tree, we can begin with a thought experiment:
5.1.1.1. Imagine that I play Tennis every Saturday and I always invite a friend to come with me.
5.1.1.2. Sometimes my friend shows up, sometimes not.
5.1.1.3. For him it depends on a variety of factors, such as: weather, temperature, humidity, wind etc.
5.1.1.4. I start keeping track of these features and whether or not he showed up to play with me.
5.1.2. We capture data across a bunch of weeks to track whether the friend showed up or not
5.1.3. An intuitive method to use the data gathered to predict whether or not the friend will show up in the future is to use a decision tree
5.1.3.1. Here's a decision tree based on the same data
5.1.3.1.1. Features of the tree:
5.2. Random Forests
5.2.1. Extends the decision tree concept in order to address the problem of overfitting and in doing so achieve better performance (i.e. better predictive power)
5.2.1.1. Consider this simple example of 3 features leading to a labelled class
5.2.1.1.1. When feature Y is selected as the root node based on this data, it produces a tree that ignores the other features
5.2.1.2. To avoid overfitting due to feature bias, random forests generates a random set of decision trees, and the mean prediction of the "forest" is given as the overall predicted outcome
5.2.1.2.1. Every tree in the forest gets a new random selection of features chosen at every single split
6. Data profiling
6.1. In the Udemy course lecture, we didn't do much of this beyond a simple peek at the data with df.head()
6.1.1. Import libraries
6.1.1.1. import pandas as pd import numpy as np import matplotlib.pyplot as plt import seaborn as sns %matplotlib inline
6.1.2. Read data from file into Pandas DataFrame
6.1.2.1. df = pd.read_csv('kyphosis.csv')
6.1.2.1.1. Note: this particular file is a small dataset relating to the outcomes of operations on children for a medical condition called Kyphosis
6.1.3. Peek at the head of the DataFrame
6.1.3.1. df.head()
6.1.3.1.1. Note that the features are Age, Number and Start, and Kyphosis is the labelled category we want to predict.
6.2. See Python and logistic regression map for more info on data profiling in general
7. Exploratory Data Analysis (EDA)
7.1. In the Udemy course lecture, we didn't do any EDA apart from a pairplot
7.1.1. See Python and logistic regression map for more info on EDA in general
7.1.2. sns.pairplot(df,hue='Kyphosis',palette='Set1')
8. Data cleaning
8.1. In the Udemy course lecture, we didn't do any data cleaning for decision trees/random forests
8.1.1. See Python and logistic regression map for more info on data cleaning in general