

1. Welcome
1.1. Today's Training
1.1.1. Cover each part of the Kajabi App in the order you see things on the Kajabi navigation
1.1.1.1. Receive the recording of today's training
1.1.2. Step by Step Guide (Mindmap)
1.1.2.1. Reference the Step by Step Guide for more details after this training.
1.1.2.1.1. Serves as a Project Management tool as you work your way through Kajabi
1.1.2.2. I will "share" the map with you by after our training
1.1.2.2.1. Click here to sign up for FREE account at MindMeister Online Mind Mapping and Brainstorming
1.1.2.3. This Mind Map will continue to be updated so may not always match the replay you have access to.
1.1.3. Kajabi Overview
1.1.3.1. Features and Functionality
1.1.3.2. Understand where everything is
1.1.3.3. How the sections of the app work together- connect the dots
1.1.3.4. Mixture of Screen Shots and Live Demos
1.1.4. Q&A at end of each section
1.1.4.1. Enter your Questions in the CHAT as you have them and I will answer them at the end of each section.
1.1.4.2. If the answer is too complicated or too specific to your situation I will get you an answer afterwards.
1.1.5. 15 Breaks after each section
1.1.6. 30 Minutes for Lunch
1.2. Kajabi Help
1.2.1. Kajabi Live Chat
1.2.2. Kajabi Assistant
1.2.3. Official Kajabi User Group
2. Site Settings
2.1. Site Settings
2.1.1. This is where you manage a variety of site settings inside of Kajabi.
2.1.2. Site Details
2.1.2.1. Site Information
2.1.2.1.1. Site Title and Domain Name
2.1.2.1.2. Support Email
2.1.2.1.3. Support Phone
2.1.2.1.4. Languange
2.1.2.1.5. Default Currency
2.1.2.2. Home Page
2.1.2.2.1. Choose what to display when users view the "root" of your site
2.1.2.2.2. How to create a custom home page for your website
2.1.2.3. Branding
2.1.2.3.1. Default Logo and Favicon used across your whole Kajabi Site
2.1.2.3.2. How to Customize Site Brand Settings
2.1.2.4. Colors
2.1.2.4.1. Default color palette shown in the color pickers throughout Kajabi
2.1.2.4.2. How to Customize Site Brand Settings
2.1.2.5. Instructor
2.1.2.5.1. Set default instructor information for all Products
2.1.2.5.2. How to Customize Site Brand Settings
2.1.2.6. Page Scripts
2.1.2.6.1. Add custom javascripts to be added to all pages of your site
2.1.2.7. SEO and Sharing
2.1.2.7.1. Information about this page for SEO and sharing with Facebook, etc.
2.1.2.8. Display Powered by Kajabi Branding
2.1.2.8.1. You cannot turn of the Kajabi Branding on the Basic Plan
2.1.3. Blog Settings
2.1.3.1. Manage the SEO Settings of your Blog
2.1.4. Payment Integrations
2.1.4.1. Connect your account to Paypal and/or Stripe
2.1.4.2. Connect Paypal
2.1.4.2.1. Kajabi Help Article
2.1.4.3. Connect Stripe
2.1.4.3.1. Kajabi Help Article
2.1.5. Custom Domain
2.1.5.1. Set up your custom domain for your Kajabi Site Instead of catherinedove.mykajabi.com I would then use catherinedove.com
2.1.5.2. How to Kajabi Help Article
2.1.6. Mobile App Settings
2.1.6.1. Manage your site settings for the Kajabi Mobile App
2.1.6.1.1. Mobile Icon
2.1.6.1.2. Kajabi App Promotion
2.1.6.2. How to Change your Site Icon for the Mobile App
2.1.7. Marketing Settings
2.1.7.1. Control the address, branding and email settings for your site
2.1.7.2. Marketing Contact Address
2.1.7.2.1. Required contact address that will show in the footer of all emails.
2.1.7.3. Company Logo
2.1.7.3.1. Logo placed at the top of marketing emails (Email broadcasts). Use a transparent PNG logo.
2.1.7.3.2. How do I make my logo appear in all of my Email Campaigns?
2.1.7.4. Email Settings
2.1.7.4.1. Complete your FROM NAME and REPLY TO email. Leave SENT from email as is.
2.1.7.5. Email Sequence Defaults
2.1.7.5.1. Configure the default settings for the time you would like emails to be deployed when you set up an email sequence.
2.1.7.6. How to Customize your Marketing Settings
2.1.8. Drip Settings
2.1.8.1. Configure what time of day Drip categories will become available to your members. Be sure to check the box if you want your members notified when new categries are available.
2.1.8.2. Live Demo
2.1.9. Third Party Integrations
2.1.9.1. Connect to other applications that work hand in hand with Kajabi
2.1.9.2. Email Integrations
2.1.9.2.1. AWeber, MailChimp, Drip, ConvertKit, Active Campaign
2.1.9.3. Analytics
2.1.9.4. Facebook Pixel
2.1.9.5. Zapier
2.1.9.6. Click Funnels
2.1.9.7. Live Demo
2.1.10. Fields
2.1.10.1. Manage the form fields used in all your Kajabi forms
2.1.10.1.1. Default and Custom Fields
2.1.10.1.2. Live Demo
2.1.11. Checkout Settings
2.1.11.1. This is where you manage the under the hood settings of your checkout process
2.1.11.1.1. Choose how you want your members to be opted into your email list when they purchase from you.
2.1.11.2. ADVANCED FEATURE: Webhooks
2.1.11.2.1. Configure webhooks for your site here.
2.1.11.2.2. Kajabi Help Article
2.1.11.3. ADVANCED FEATURE Checkout Tracking Code
2.1.11.3.1. Add custom tracking code for all the checkout pages on your site
2.1.11.4. Live Demo
2.1.12. Subscription Cancellation
2.1.12.1. This is where you can enable members to self-cancel their subscriptions
2.1.12.2. How your members can cancel their own subscription
2.1.13. Email Templates
2.1.13.1. These are Global Templates
2.1.13.2. Member Welcome Email
2.1.13.2.1. Sent to members that you create on the site manually or via webhooks.
2.1.13.3. Offer Purchase Confirmation
2.1.13.3.1. Sent to new members when they purchase a new product from you.
2.1.13.4. Affiliate User Welcome Email
2.1.13.4.1. Sent to affiliate users when they are created on your site.
2.1.13.5. Affiliate Conversion Notification
2.1.13.5.1. Sent to affiliates when they make a sale for you.
2.1.13.6. Reply Comment Notification
2.1.13.6.1. Sent to members when people reply to their comments.
2.1.13.7. Member Drip Notification
2.1.13.7.1. Sent to members daily if dripped categories become available to them.
2.1.13.8. Announcement Notification
2.1.13.8.1. Sent to members when a product announcement is posted.
2.1.13.9. Affiliate Announcement Notification
2.1.13.9.1. Sent to affiliates when you create an affiliate announcement.
2.1.13.10. Member Payment Subscription Failed
2.1.13.10.1. Sent to members when payment information does not successfully process.
2.1.13.11. Offer Grant Confirmation
2.1.13.11.1. Sent to members when they are granted a new product.
2.1.13.12. Assessment Completion
2.1.13.12.1. Sent to contacts when they complete an assessment.
2.1.13.13. Cart Abandonment
2.1.13.13.1. Sent to contacts when they do not complete offer checkout
2.1.13.14. Double Opt-In
2.1.13.14.1. Sent to new contacts when double opt-in is enabled on a form.
2.1.13.15. New Community Comment
2.1.13.15.1. Sent to followers following a community post.
2.1.13.16. Community Connect Request
2.1.13.16.1. Sent to community members when someone wants to connect with them.
2.1.13.17. Community Post Notification
2.1.13.17.1. Sent to community members when an admin opts to send a notification when posting.
2.1.13.18. Mention Notification
2.1.13.18.1. Sent to people when they have been mentioned within content.
2.1.13.19. Live Demo
2.1.13.20. How to Edit the Automated Emails Sent by your Site
2.1.14. Static Pages
2.1.14.1. Examples
2.1.14.1.1. Terms of Use
2.1.14.1.2. Privacy Policy
2.1.14.2. Live Demo
2.1.14.3. How to Create a Static Page
2.1.15. Account Settings
2.1.15.1. Setting Options
2.1.15.1.1. Account Details
2.1.15.1.2. Billing
2.1.15.1.3. Account Password
2.1.15.1.4. Email Notifications
2.1.15.1.5. Account Users
2.1.15.1.6. Contact Info
2.1.15.1.7. TURN LIGHTENING LOADER ON
2.1.16. Q&A
3. Website
3.1. Website
3.1.1. This is where you set up and manage the main components of your website.
3.2. Design
3.2.1. Preview your Website
3.2.2. Manage Themes
3.2.2.1. Chose a Theme: Theme Management
3.2.2.1.1. There are different themes that you can customize that are built on the Premier Framework.
3.2.2.1.2. Customize your Theme
3.2.2.1.3. Live Demo
3.2.2.1.4. Tip: You can work on themes that are not active until you activate them.
3.2.3. Navigation
3.2.3.1. You can have "top" and "footer" navigation menus, as well as "product" menus.
3.2.3.1.1. Navigation Menu Overview
3.2.3.1.2. Header Navigation
3.2.3.1.3. Footer Navigation
3.2.3.2. Items on Navigation can be
3.2.3.2.1. Category
3.2.3.2.2. Post
3.2.3.2.3. Page
3.2.3.2.4. Link (URL)
3.2.4. Website Design
3.2.4.1. The website pages include your home page of your site, as well as all other pages used in Kajabi throughout your website
3.2.4.1.1. Website Design
3.2.4.2. Homepage
3.2.4.2.1. Homepage is the default front page of your site also known as the Theme Index.
3.2.4.3. Library
3.2.4.3.1. Library is the page in which your Members can access all the products they have purchased from your site.
3.2.4.4. Store
3.2.4.4.1. The Store Page is a page designed to showcase your products. Think of a store page like a physical store. You can pull in OFFERS in your store.
3.2.4.5. Login
3.2.4.5.1. Login is what your Members will see to login to your site and access all the products they have purchased.
3.2.4.5.2. You can add an image and customize the colors
3.2.4.6. Static Page
3.2.4.6.1. Static Page is often used for simple pages containing only text and image such as an About Us page, Privacy Policy, Terms of Service
3.2.4.6.2. How to Customize Static Pages
3.2.4.6.3. How to Create a Static Page [SETTINGS]
3.2.4.7. Thank You Page
3.2.4.7.1. Thank You Page can be used as a default page for your Members to see immediately after purchasing an Offer.
3.2.4.8. 404 Page
3.2.4.8.1. 404 Page appears when your site visitors attempt to reach a page on your site that does not exist.
3.2.4.9. Blog
3.2.4.9.1. Blog will act as the homepage for your blog redirecting visitors to your blog posts.
3.2.4.10. Blog Post
3.2.4.10.1. Blog Post controls the design for all the Blog Posts published on your site.
3.2.4.11. Blog Search
3.2.4.11.1. Blog Search will show you what it will look like when people search for specific keywords or terms associated with your Blog Posts.
3.3. Pages
3.3.1. We can use Pages as part of our website, or stand alone pages for opt ins, webinar registration pages, sales pages etc. Pages are stored in either Stand Alone Pages or Pipeline Pages. You can search for Pages using keywords.
3.3.2. Live Demo
3.3.3. Tip: Create a Master Page that you can clone
3.4. Blog
3.4.1. Set up your Blog Settings
3.4.1.1. To create and customize your Blog, you must first set up your Blog by configuring your Blog Settings and creating your first Blog Post.
3.4.1.2. SEO & Sharing
3.4.1.2.1. Your Blog Settings contain the SEO and Sharing information to be used for your Blog homepage and all the Blog Posts without individual SEO settings set up. Learn to set up the SEO and Sharing section in your Blog Settings.
3.4.2. Creating a Blog Post
3.4.2.1. Live Demo
3.5. Analytics
3.5.1. Overview of Analytics
3.6. Q & A
4. Products
4.1. Product
4.2. # of Products is based on the plan you have
4.2.1. Basic- 3 Products
4.2.2. Growth-15 Products
4.2.3. Pro- 100 Products
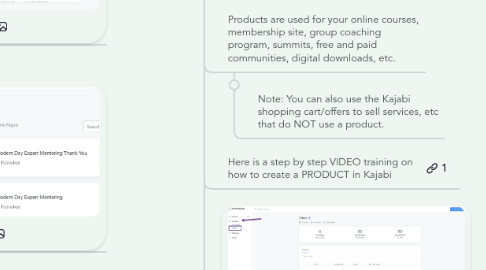
4.3. Products are used for your online courses, membership site, group coaching program, summits, free and paid communities, digital downloads, etc.
4.3.1. Note: You can also use the Kajabi shopping cart/offers to sell services, etc that do NOT use a product.
4.4. Here is a step by step VIDEO training on how to create a PRODUCT in Kajabi
4.5. Offers/CheckOut
4.5.1. Create New Offer
4.5.1.1. Kajabi Help Article
4.5.1.2. Step 1
4.5.1.2.1. Title
4.5.1.2.2. Product
4.5.1.2.3. Price
4.5.1.3. Step 2: Offer Detail Page
4.5.1.3.1. What you entered in Step 1 will pull through to Step 2 on the Offer Page
4.5.1.3.2. Title: Pulled in from Step 1
4.5.1.3.3. Product Access
4.5.1.3.4. Included Products
4.5.1.3.5. Upsell
4.5.1.3.6. Cart Abandonment
4.5.1.3.7. Automations
4.5.1.3.8. Published or Draft
4.5.1.3.9. Price
4.5.1.3.10. Product Image
4.5.1.3.11. After Purchase
4.5.1.4. Stats
4.5.1.5. Edit Checkout
4.5.1.5.1. Kajabi Help Article
4.5.1.5.2. Offer Details
4.5.1.5.3. Extra Contact Information
4.5.1.5.4. Service Agreement
4.5.1.5.5. Testimonials
4.5.1.5.6. Footer Navigation
4.5.1.5.7. Order Bump
4.5.1.6. Preview
4.5.1.7. Get Link
4.5.1.8. More Actions
4.5.1.8.1. Clone
4.5.1.8.2. MarketPlace
4.5.1.8.3. Webhooks
4.5.1.8.4. Delete
4.6. Q&A
5. Marketing
5.1. Pipelines (AKA Funnels)
5.1.1. Description: Visual of all landing pages, email sequences and offers with the ability to easily edit everything and see the stats.
5.1.1.1. Kajabi Resources
5.1.1.1.1. Pipelines Overview
5.1.1.1.2. Mastering Pipelines Course
5.1.1.1.3. Crafting your Pipeline
5.1.2. Create a New Pipeline
5.1.2.1. Kajabi has put together the most common funnels used in online marketing for you.
5.1.2.1.1. Pipeline Templates
5.1.2.2. Create a Pipeline from Scratch
5.1.2.2.1. Create your Pages, Forms, and Email Sequences and then add them to a Pipeline
5.1.3. Pipeline Performance
5.1.3.1. View Stats
5.1.3.1.1. Pipeline Stats
5.1.3.2. In your Pipeline Stats view the analytics for each component of your Pipeline. (Opt Ins and Conversions)
5.1.4. TIP: You have a limit on the number of pipelines based on the plan you have.
5.1.4.1. Basic- 3 Pipelines
5.1.4.2. Growth- 15 Pipelines
5.1.4.3. Pro- 100 Pipelines
5.2. Email Campaigns
5.2.1. We can send Email Broadcasts and Email Sequences from within Kajabi
5.2.2. Email Broadcasts and Email Sequences and How to Use Them
5.2.2.1. Must be subscribed to MARKETING emails
5.2.2.1.1. What are marketing and transactional emails?
5.2.3. Create an Email Broadcast
5.2.3.1. Email Broadcasts allow us to send a single email to our entire list or to a custom segment.
5.2.3.1.1. We can send it immediately and we can schedule it to be sent out at a specific time within the next year.
5.2.3.2. Choose Type of Email Broadcast ~Class Email Editor (Text) or Visual Email Templates
5.2.3.2.1. Visual Email Templates
5.2.3.3. Step 1: Edit Recipients
5.2.3.3.1. Send to All Members (subscribers)
5.2.3.3.2. Send to a Custom Segment
5.2.3.4. Step 2: Edit Content
5.2.3.4.1. Write Subject Line and Email
5.2.3.4.2. Add Images, PDFS Links, CTA Buttons
5.2.3.4.3. Automations
5.2.3.5. Step 3: Review Email
5.2.3.5.1. Send a preview to your email. This allows you to test links which don't work in the preview.
5.2.3.6. Step 4: Send Email
5.2.3.6.1. Send immediately, schedule to go out later, or put it in draft mode.
5.2.4. Create an Email Sequence
5.2.4.1. An Email Sequence is a series of emails that will begin sending immediately after the user is subscribed or a certain amount of days after the user has been added to the sequence. (Form filled out, purchase made, tag applied, etc)
5.2.4.2. How to Create an Email Sequence
5.2.4.3. Live Demo
5.2.5. Email Stats & Reporting
5.2.5.1. Kajabi tracks Clicks, Opens, Bounces and Unsubscribes
5.2.5.1.1. Kajabi Help Article
5.2.6. Creating Email Campaign Guide
5.3. ADVANCED FEATURE: Automations
5.3.1. Automations is an extremely powerful tool that uses when/then/if logic to help you streamline Kajabi processes and ultimately automate basic actions in the admin.
5.3.1.1. Kajabi Help Article
5.3.2. Basic and Advanced Automations
5.3.2.1. Kajabi Help Article
5.3.2.2. When
5.3.2.3. Then
5.3.2.4. If
5.3.2.4.1. Conditionals in the Automations infrastructure will allow you to add the "If" condition to all of your Automations. For instance, say you want to add a tag to all users who have submitted through a Form, but ONLY IF they answered a specific question on that Form with a specific answer.
5.3.2.5. Create and View all Automations
5.3.2.5.1. In addition to this area you can add them throughout the app. For example when creating a form, or sending an email broadcast.
5.3.2.6. How to use Automations with:
5.3.2.6.1. Pipelines
5.3.2.6.2. Email Campaigns
5.3.2.6.3. Events
5.3.2.6.4. Forms
5.3.2.6.5. Offers
5.3.2.6.6. Posts
5.4. ADVANCED FEATURE Events
5.4.1. Events can be used for product launches, webinars and in person events. An event is specific date and time you want to surround emails and automated actions. People can be registered to an event by filling out a form, purchasing an offer, and additional automations.
5.4.2. Kajabi Help Article
5.4.3. You can set up a series of emails that will automatically deploy before and after the event. You can set up "recurring" events. You can use automations when someone is registered for an event.
5.5. Forms
5.5.1. A Form is what we use to opt in to our email list, register for an event, subscribe someone to an email sequence, segment our lists and grant free offers.
5.5.1.1. These are pulled into Landing Pages, can be embedded on blog posts and inside posts in your products.
5.5.1.2. Kajabi Help Article
5.5.2. We put the forms in many places: Landing Pages Website Blog Posts
5.5.3. Customizing Forms
5.5.3.1. Once you have created the form you can embed it on your website, landing pages, blog posts etc. You can brand it prior to embedding it.
5.5.4. Tips: You can use the same form in multple places.
5.6. Q&A
6. People
6.1. All People
6.1.1. In this section you can see all of the people in your site, search for them, and manage tags.
6.1.1.1. Kajabi Help Article
6.1.2. People Information
6.1.2.1. How to Segment Your Contacts
6.1.2.2. Tags
6.1.2.2.1. Kajabi Help Article
6.1.2.2.2. We can tag users manually and automatically based on their actions and we can also use tags to segment our lists.
6.1.2.3. Life Cycle
6.1.2.4. Information
6.1.2.5. Purchases
6.1.2.6. Products
6.1.2.7. Notes
6.2. Assessments
6.2.1. Assessments can be used as quizzes or tests in a product, or as a survey on a landing page.
6.2.1.1. You can grade the assessments and tag people according to their answers.
6.2.2. Tip: You can set an assessment in a product so that the student cannot progress until they complete a lesson in the course.
6.2.3. Assessment Guide
6.2.4. Customize and Create Assessments
6.3. ADVANCED FEATURE Affiliates
6.3.1. Growth or Premium Plans include ability to track affiliate commissions
6.3.1.1. Affiliate Guide