
1. Query Editor process after source connection is made
1.1. Review table names and change them if appropriate
1.2. Work through column names and change these to be meaningful and adhere to consistent naming conventions
1.2.1. Keeping spaces in column names is a good practice because Power BI is a business facing application
1.3. For fact tables, look at key date column and implement filter to reduce rows to the minimum needed for the reporting purpose
1.4. Remove all columns that you aren't sure you will use
1.4.1. They can always be un-removed later
1.4.2. Key point is that you want your Power BI data models to contain tables with just the right amount of data needed to deliver the dashboard and/or reports within pbix file you're developing
1.5. Before clicking "Close & Apply", group select all the tables and choose option to "Move to Group" -> "New Group..."
1.5.1. "Data Model" is a good name for these queries
2. Troubleshooting broken queries
2.1. Changes to source data
2.1.1. Affects one of the first 3 auto-steps in the table query
2.1.1.1. File name change or location change is breaking
2.1.1.2. Adding, removing or renaming source columns is breaking
2.1.1.3. Changing data can invalidate the initial "Changed Type" transformation
2.1.2. Use the advanced editor to fix the problems
2.1.2.1. You can use Query Editor in the same Power BI file to connect to one of the broken table queries and figure out via comparison what the breaking change was
2.2. Changes to steps that break later steps
2.2.1. Example: going back to an early column renaming transformation and renaming another column may break a later column reordering transformation
2.2.1.1. This is because the column reordering transformation names every column in the table at the time the transformation was created and the automation of the M code is not smart enough (at time of writing at least) to automatically update that later transformation
2.2.2. First clue is the yellow exclamation mark appearing against the table
2.2.3. Step through the applied steps to see where the break happens, then fix it using the advanced editor
3. Never use "Get data" option on the Home page; always use Query Editor instead to connect and bring data into your model
3.1. Source data is rarely clean and ready for your data model
3.2. Start Query Editor by clicking "Transform data"
3.3. Queries developed in the Query Editor give you a view on the data, allowing you to transform it without actually bringing all the data into the data model
3.4. Using "Get data" can cause problems
3.4.1. After connection is made, you are prompted to load data, which commits the entire source data to your data model
3.4.2. Load errors can occur that you would have got sight of before loading if using Query Editor
3.4.3. Creates sub-optimal tables in the model
3.4.3.1. We want to eliminate all redundant columns not needed for report
3.4.3.2. We want to break wide, flat tables with mixed data into separate, related tables that are much more tightly focussed by subject
4. Always organise your queries
4.1. Create folders for queries (e.g. "Data Model", "Measure Groups", etc.)
4.2. Give all your queries concise and meaningful names
4.3. Queries and query folders can be moved up and down in the navigator pane so you can implement a good logical sequence
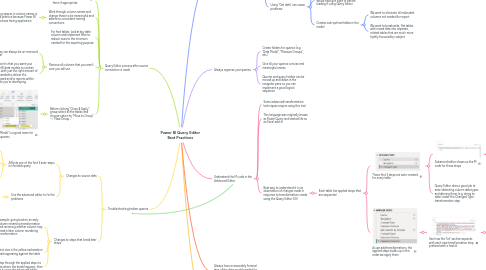
5. Understand the M code in the Advanced Editor
5.1. Some advanced transformation techniques require using this tool
5.2. This language was originally known as Power Query and started life as an Excel add-in
5.3. Best way to understand it is via observation of changes made in response to transformations made using the Query Editor GUI
5.3.1. Each table has applied steps that are sequential
5.3.1.1. These first 3 steps are auto-created for every table
5.3.1.1.1. Advanced editor shows us the M code for these steps
5.3.1.1.2. Query Editor does a good job at auto-detecting column data types and altering them (e.g. string to date) under the Changed Type transformation step
5.3.1.2. As we add transformations, the applied steps builds up in the order we apply them
5.3.1.2.1. See how the "let" section expands with each new transformation step prefixed with a hash #
6. Always have a reasonably formed idea of the data model needed for your Power BI report before commencing work in Query Editor
7. Bring data into Query Editor via "New Source" under the Home tab
7.1. Excel source tips
7.1.1. Try to have data created in Excel tables
7.1.1.1. Query Editor will show you all the tables and the worksheets separately; choose the tables to bring in, rather than worksheets
7.2. Blank query is handy for creating tables out of thin air, such as a Date table
7.2.1. Pre-prepared M queries can be copied and pasted in via the advanced editor