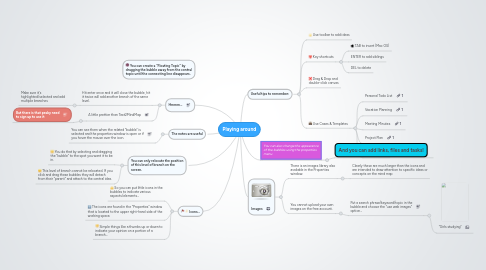
Playing around
by Emma Jane


1. The notes are useful
1.1. You can see them when the related "bubble" is selected and the properties window is open or if you hover the mouse over the icon.
2. Icons...
2.1. So you can put little icons in the bubbles to indicate various aspects/elements...
2.2. The icons are found in the "Properties" window that is located to the upper right-hand side of the working space.
2.3. Simple things like a thumbs up or down to indicate your opinion on a portion of a branch...
3. Hmmm...
3.1. Hit enter once and it will close the bubble, hit it twice will add another branch of the same level.
3.1.1. Make sure it's highlighted/selected and add multiple branches
3.2. A little prettier than Text2MindMap
3.2.1. But there is that pesky need to sign up to use it
4. You can create a "Floating Topic" by dragging the bubble away from the central topic until the connecting line disappears.
5. You can only relocate the position of this level of branch on the screen.
5.1. You do that by selecting and dragging the "bubble" to the spot you want it to be in.
5.2. This level of branch cannot be relocated. If you click and drag these bubbles they will detach from their "parent" and attach to the central idea.
6. Useful tips to remember:
6.1. Use toolbar to add ideas
6.2. Key shortcuts
6.2.1. TAB to insert (Mac OS)
6.2.2. ENTER to add siblings
6.2.3. DEL to delete
6.3. Drag & Drop and double-click canvas
6.4. Use Cases & Templates
6.4.1. Personal Todo List
6.4.2. Vacation Planning
6.4.3. Meeting Minutes
6.4.4. Project Plan
6.4.5. more...
7. Images
7.1. There is an images library also available in the Properties window.
7.1.1. Clearly these are much larger than the icons and are intended to draw attention to specific ideas or concepts on the mind map
7.2. You cannot upload your own images on the free account.
7.2.1. Put a search phrase/keyword/topic in the bubble and choose the "use web images" option...
7.2.1.1. "Girls studying"
