Having read (and visualized) John Medina’s, “Brain Rules: 12 Principles for Surviving and Thriving at Work, Home, and School” I’ve walked away with a ton a new concepts and processes, but one that stood out to me was Medina’s Rule #10, which states that vision trumps all other senses. Naturally, as MindMeister is a data visualization tool, I’m over the moon to hear that Medina agrees, but this got me to thinking – How do we further enhance the “visual” of MindMeister?

The go-to answer here is, naturally, images. There are a multitude of ways to enrich your mind maps with icons and images, so let’s take a look at your options:
Adding Images to the Topics in Your Mind Map
1. Drag-and-drop images onto topics
You can easily drag and drop images directly from your desktop to a topic in your mind map.
2. Copy and paste images onto topics
This is a great way to insert images from other websites into your mind maps. If you seen an image on the web that you want to use, just right-click it and select Copy Image from the menu that appears. With the image in your clipboard, go to your mind map, select a topic and press CMD+V (or CTRL+V if you’re on Windows). MindMeister will then ask you whether you want to paste the file as an image or as an attachment.

Note: We probably don’t have to point this out, but do make sure that you have permission to use the copied image, especially if you’re using your mind map for commercial purposes.
3. Upload images from your computer
Go to the sidebar on the right side of the mind map editor and switch to the image tab. Click on Add image… and select the option to upload a new image from the drop-down menu.

4. Insert images from MindMeister’s library (or your own!)
Follow the same steps as outlined above to get to the Add image… menu. Select Browse image library… to view MindMeister’s standard images. Within the same dialog you can also switch to your own library, filled with images you’ve previously uploaded.

5. Draw images
MindMeister even lets you draw your own images right inside the map editor, and insert them into topics. To do this, follow the steps as outline above, then select the option Draw image… from the menu. This will open a simple image editor where you can get creative.

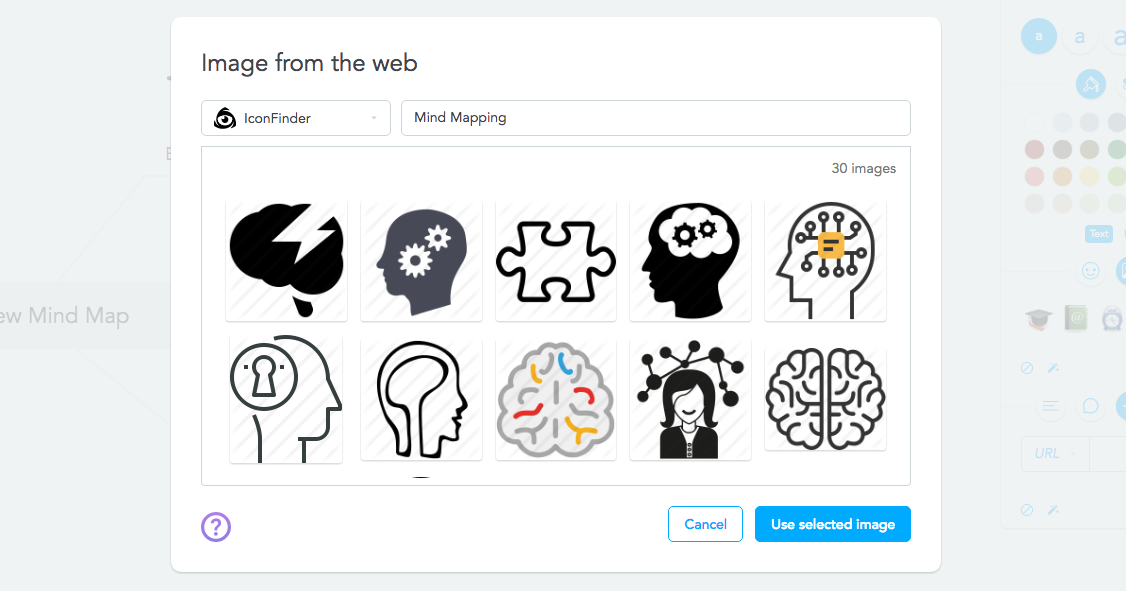
6. Use an image from the web
This feature employs the power of Google Images to match the text of your topic to a matching image and then offers you the option to select and insert the most appropriate visual.

Besides Google, you can also select ‘IconFinder‘ as your source, or manually enter a URL.
6. Use WunderBild to magically insert images
If manually selecting an image is too much of a hassle for you, MindMeister’s got you covered. Using our miraculous WunderBild feature, MindMeister automatically searches the web for a matching image, and inserts it into your topic.
To use this feature, simply select a topic in your mind map and click on the small magic wand icon in the image widget (in the right sidebar). If you don’t like what you see, just click the icon again to insert another image.

How to Modify Images in Your Mind Map
1. Resize Images
To resize an image, just select the topic and hover over the image until the black corner appears. Click on the corner and drag your cursor to make the image larger or smaller. Tip: Keep the SHIFT key pressed while resizing to ensure that the image isn’t distorted.

2. Save, Edit and Remove Images
Select a topic and hover over the image until the gray frame appears. In the upper right corner, you’ll see a menu button. Click the button to open a drop-down menu where you can choose between saving the image to your image library, editing the image, or removing it from the map.
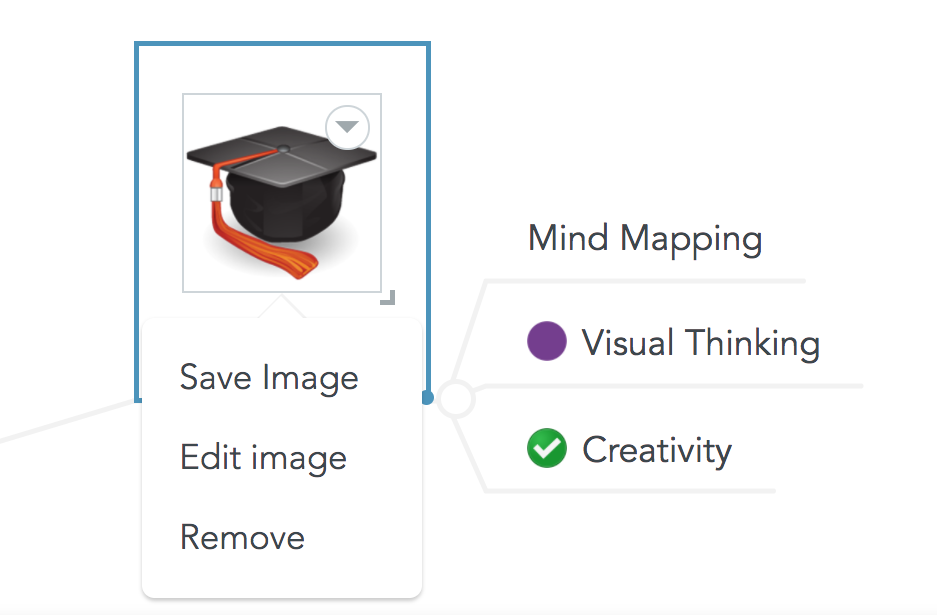
If you click on Edit image, you’re presented with a new dialog where you can draw directly on the image.

By the way, you can also remove an image by selecting the topic and clicking the small icon that looks like a stop sign in the image widget in the right sidebar (next to the magic wand icon).
Upload Custom Background Images to Your Mind Maps
When we talk about images in mind maps, we always talk about the small ones that enhance individual topics. But did you know that you can also upload big background images to your mind maps?

To do this, open the Customize Map Theme dialog via the top bar and switch to Background & Lines. Click on Choose File to upload an image from your computer.

So these are all the different ways you can add images to your mind maps. By giving your maps a dash of variety and visual representations, you’re sure to increase both comprehension and retention of the data presented. Give it a try!
Note: This article was last updated 14th March 2017.
Create Beautiful Mind Maps Online
Sign up for MindMeister